
Game Recap: Playing Against a Grandmaster in the 2024 Stephen Sosnick Memorial Simul
Or, why Joel Benjamin is a Grandmaster and I am not.

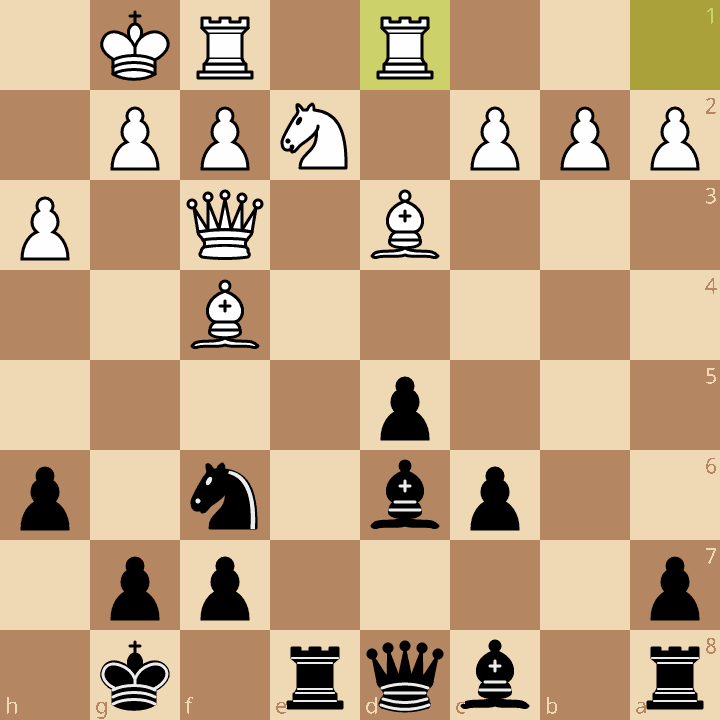
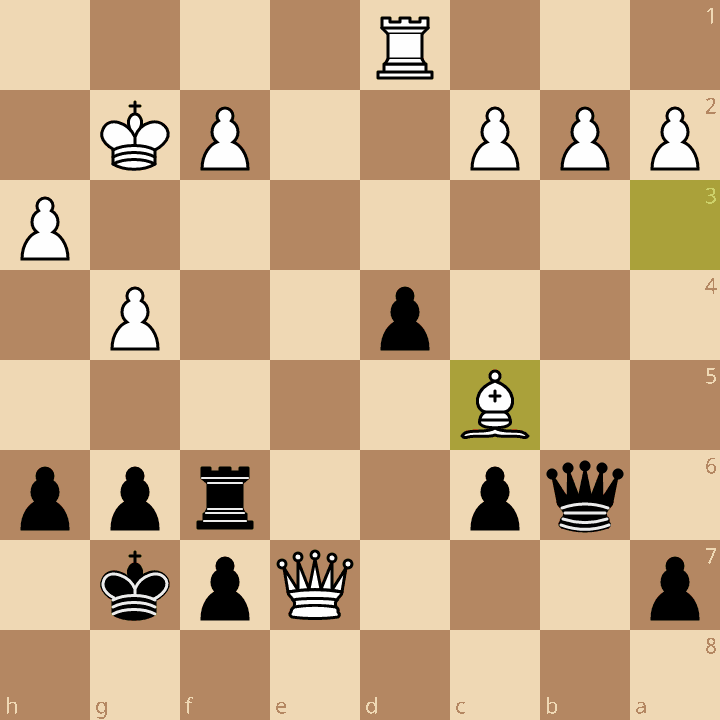
I’m interrupting my current schedule of putting out weekly game recaps to bring you a game I played just yesterday at the Stephen Sosnick Memorial. I (and many other players) had the Black pieces against GM Joel Benjamin. Last year, I had participated in the same simul event and it was a blast, though my game (a half-accepted Benko Gambit) ended rather quickly and I had hardly put up any resistance at all. Here is the penultimate position from that game in 2023. White to play and win:
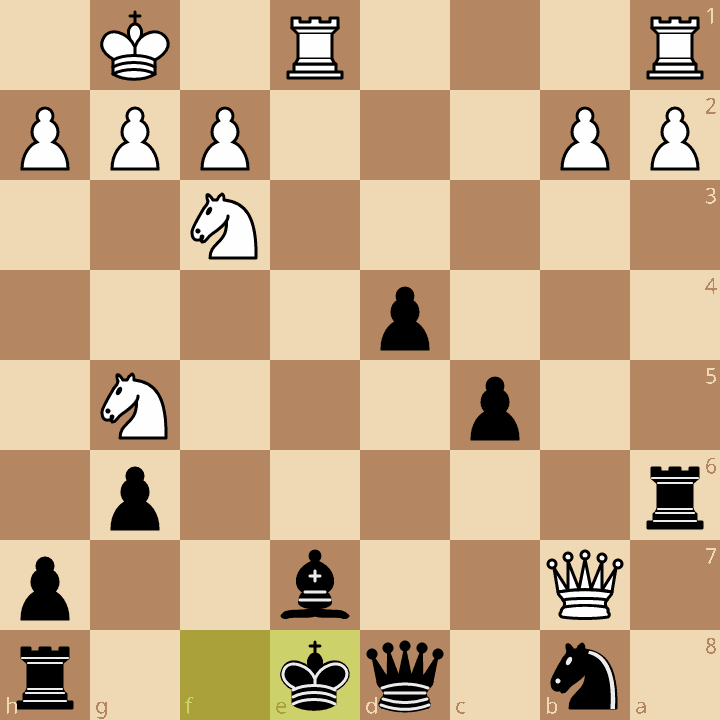
Leave a comment with the move you think GM Joel Benjamin played here to make me resign on the spot!
This year, having studied the Benko Gambit plenty since, I was looking forward to putting up more resistance. Let’s see how last night’s game went:
Time Control: Simultaneous Display (you move when the simul-giver comes to your board, but they gave us three opportunities to pass for more time)
White: GM Joel Benjamin (2579 USCF, 2490 FIDE)
Black: Me (1654 USCF)
1.e4!
Any and all opportunities to show my improvement in the Benko Gambit have been refuted by Joel’s first move. Alas…
1…e5
I am in the middle of a repertoire update, but want to put up a tougher fight in this game, so I decided to stick with the Open Game:
2.Nf3 Nc6 3.Nc3 Nf6 4.d4
We are headed into another Scotch Four Knights Game. These positions can be rather dry, but offer White the slightest of edges to squeeze out an endgame. Black’s active play is good enough for equality.
4…exd4 5.Nxd4
Joel chooses the main line. White, as I’ve posted about before, also has the option to play 5.Nd5!?, the Belgrade Gambit.
5…Bb4 6.Nxc6 bxc6
The typical Scotch Game idea. By disrupting Black’s pawn structure and virtually guaranteeing them a poor endgame should all the pieces come off the board, White forces Black to play actively with the pieces and avoid unnecessary trades. Active play in the Open Game typically leads to equality with best play — whereas if Black wants to fight for an advantage, they usually have to accept an inferior position for the moment and strike back at the right time. Nursing small edges like this into a win is where stronger players shine, so it’s no surprise Benjamin chose this plan.
7.Bd3 d5!
Active play in the center. Black liquidates the doubled c-pawn and establishes his presence in the middle of the board. This is the more equalizing choice. 7…d6 leads to a slightly inferior position, but by saving the d5 break for later leaves Black with more options. 7…d5 is about as forcing as it gets.
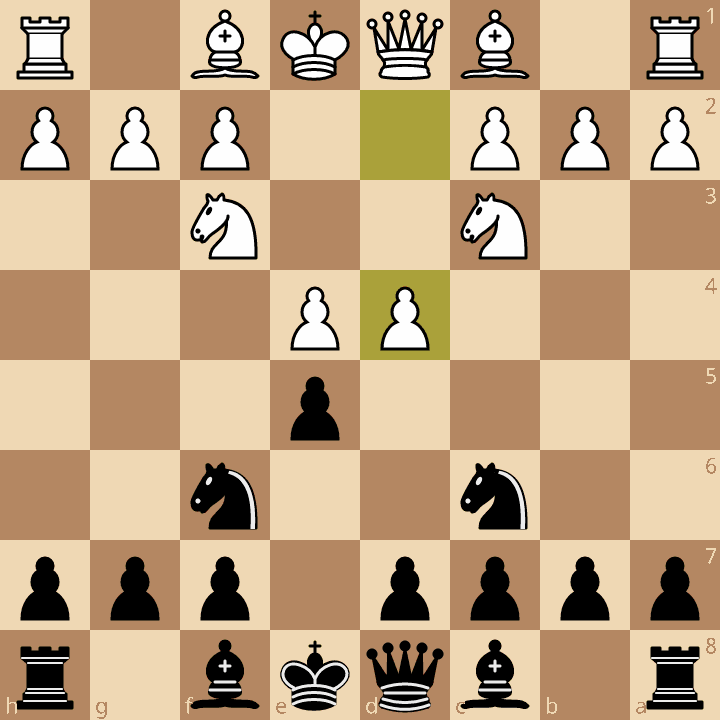
8.exd5 cxd5 9.O-O O-O 10.h3

While I have not seen this move before, it makes a lot of sense, and apart from 10.Bg5 is the most commonly played move by masters. Black has a little bit of trouble figuring out where to put the Queen’s Bishop. A natural idea would be to play Bg4 with an annoying tempo on White’s Queen. So White prophylactically prevents this right away, taking away an active move from the Bishop and “passing the move” back to Black who now has to think a bit more about where to put it, if anywhere at all. This move also gives an escape square to the King. In short, h3 is a good move.
10…h6!?
Other moves I considered were 10…c6, 10…c5, 10…Re8, 10…Rb8, and 10…Be6. All of these are virtually equal. I chose h6 simply to prevent the annoying pin after a move like Bg5. Black, as it were, “passes the move” back to White.
11.Qf3!
This is a nice move that continues development for White, preparing the connection of his Rooks, and posting the Queen to an active and unassailable square. We are still well within master game territory.
11…c6
I choose the most popular move. In truth, I didn’t see a more sensible move than to protect the d5-pawn. My follow up plans included Bd6, Re8, Rb8, and possibly preparing Ne4 down the line.
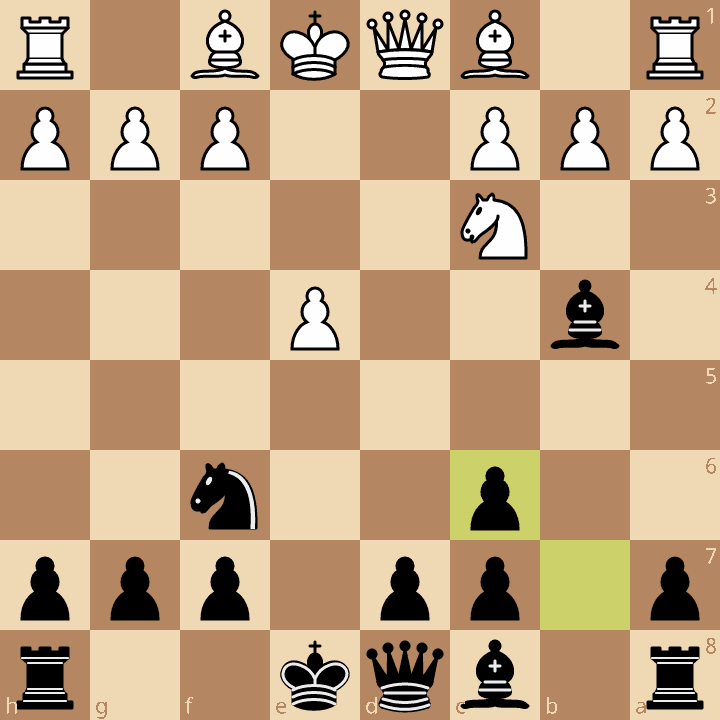
12.Ne2!?
This is a slightly curious move but it has some merit to it: White may want to expand in the center with a move like c4 at a later point, so the Knight moves out of the way. Additionally, it increases control over the f4 square, giving White more options on how to recapture if play continues (as in the game) with …Bd6 Bf4. It also may give White some options to fianchetto the Bishop after playing b3, increasing pressure on the f6-Knight via a different route, since Bg5 is no longer possible. Lichess’s Master’s database records 12 games here, and White won 58% of those games. According to the admittedly low-depth browser Stockfish 16.1 in Lichess’s analysis board, Ne2 isn’t even on the map for the engine, which I find interesting.
White’s main move here, and the engine’s top choice, is 12.Bf4, controlling d6, but probably more importantly, the b8-square, where Black’s Queen’s Rook would most likely desire to move to otherwise.
12…Bd6
The most popular move played by Masters, but also the most losing for Black. This is a more active square for the Bishop, but I also chose it for prophylactical reasons. I was worried about the possibility of the move Nd4, with an annoying threat on the c6-square that would force me to defend it and take up a passive position. For example, I was worried after 12…Re8 13.Nd4 Bd6 that the c6-Pawn was hanging. It turns out that this fear was poorly grounded. 14.Nxc6?? Qb6! and Black wins a piece for that pawn, so I could have chosen a move active move instead. Lesson learned!
13.Bf4 Re8
Between this and Rb8, I chose the former due to a plan I was cooking up in my mind.
14.Rad1!
Suddenly my plan is thrown into doubt. This position is rife with tactical possibilities for White because of this long-range x-ray of my Queen by that Rook. However, I took some extra time and talked myself into it anyway, because I had found a resource I thought was sufficient for equality.
14…Ne4??
Prudent: 14…Bxf4 or Rb8 or c5 with equality. These are all moves I considered earlier but decided to go on with my boneheaded idea instead.
15.Bxe4! Rxe4
Relatively best, and what I had calculated, but frankly Black is simply down a piece and doesn’t have the dynamics to compensate for it — I am losing hard here. The point is that 15…dxe4? can be met with 16.Qg3 (I had calculated Qh5, but this isn’t nearly as clear) and the Bishop on d6, or the Queen on d8, is lost. Another variation I had looked at but rejected was 15…Bxf4 (to avoid the Bishop being hanging) 16.Nxf4 Rxe4?? and Black loses a whole rook to 17.Qxe4! due to 17…dxe4 18.Rxd8+!
As it stands, Joel is playing into what I had calculated — probably a sign that my idea wasn’t nearly as good as I thought it was!
16.Bxd6
The only move, but good enough to be completely winning.
16…Ba6!?

The intermezzo that I thought kept the game dynamically competitive.
17.Ng3!
What I had calculated was 17.Nc3, but Ng3 is clearly a better move as it brings a piece closer to the kingside for future attacks.
17…Re6!
The second intermezzo. Also relatively best. Still, Black is down a piece, and White is completely winning.
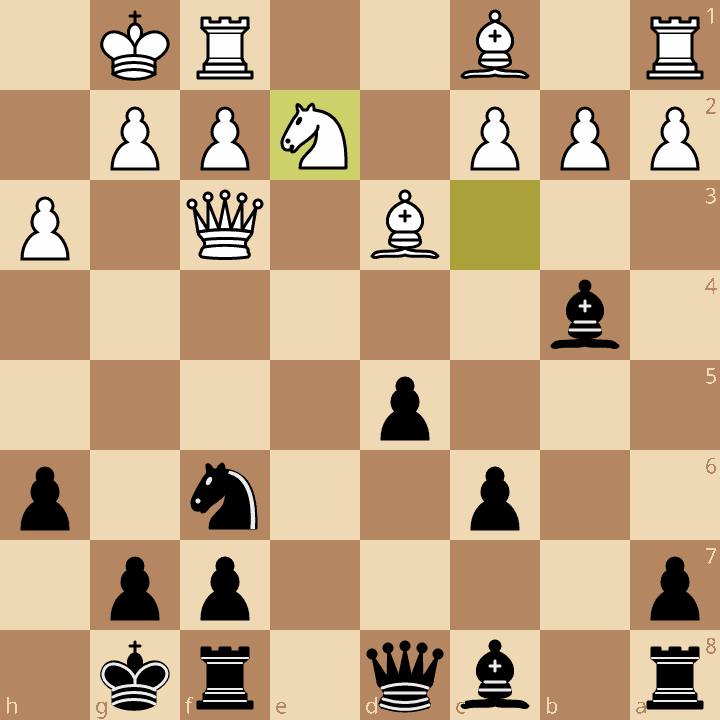
18.Ba3 Bxf1 19.Kxf1
Now that the tactical exchange is over and the position has reached some quiescence, here’s what I noticed about the position:
Black has a Rook for two pieces, so this position is technically +1 materially-speaking for White.
The Rook on the 6th rank has some dynamic possibilities due to the alignment of the White King and Queen on the f-file.
Black can possibly put down some pressure on the semi-open b-file.
Black controls the e-file.
White has a knight and Bishop for a Rook — two pieces are almost always better than a rook.
White’s Knight stands awkwardly placed on g3 and will need to move soon to become more active. “Knife-f5” is a natural idea in attacking positions like this.
White’s Bishop eyes some important dark squares in Black’s camp near the king. One possible plan for White would be to play b3, followed by Bb2, which would take away the f6-square for the Rook and pinpoint the problems of the g7-square. White could also accomplish the same things with the sequence Ba3-b4-c3
Overall White has the better game, but there’s some material imbalance that allows Black to put up a fight, and I don’t get the opportunity to play a grandmaster very often, so I decided to play like I never wanted the game to end.
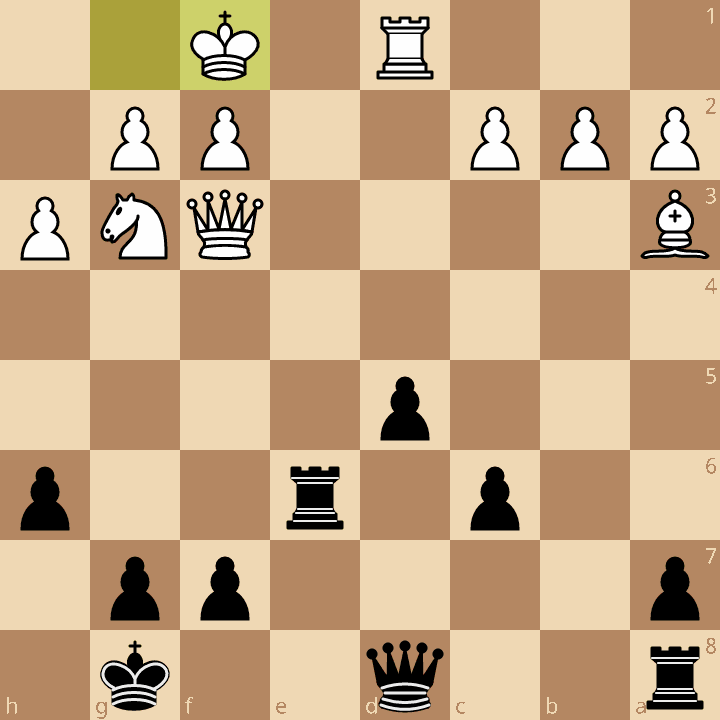
19…Qb6
The purpose of this is to double Rooks on the e-file, and prevent the Bishop from posting on the long diagonal (20.b3?? Qa6+). White therefore continues with the natural attacking plan.
20.Nf5! 20.Rae8 21.g3?
Joel derided this move in our brief post-mortem. Clearly 21.g4! was better.
21…Rf6!

Now White has some practical problems to solve: the f2-square is hard to defend, the Knight is pinned to the Queen, and in general it is easier to attack than defend.
Joel stood at the board for a minute or so and played…
22.Kg2??
Suddenly, I’m back in the game!
I’m sure that Joel would have picked a move like 22.Qd3! if he wasn’t busy playing so many other people or feeling jet-lagged from flying in from the east coast. However, the best move, according to the engine, is to simply admit the error and play 22.g4! when White is still better by a significant margin. Human nature often prevents us from making concessions even when they benefit us most — and this even affects Grandmasters!
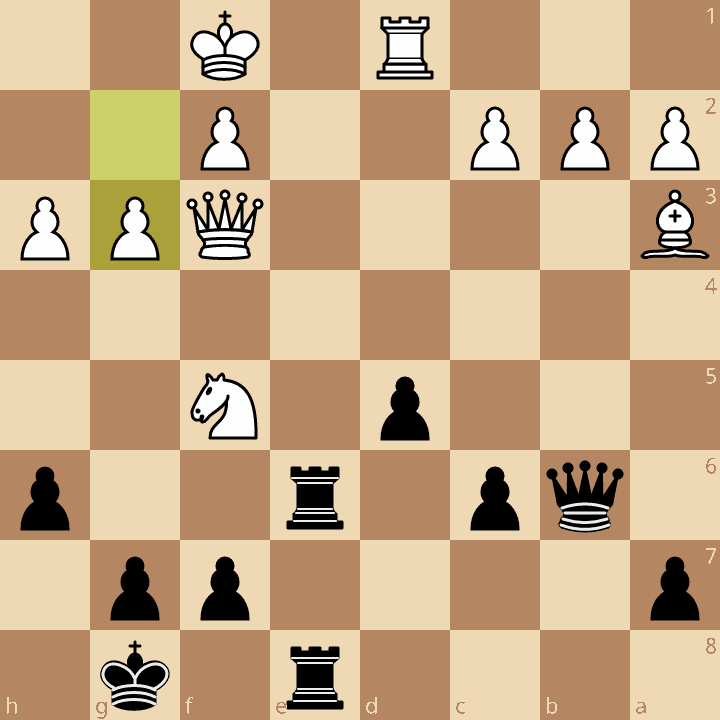
22...g6!
After this move, the game is virtually equal. Joel has some tricks up his sleeve though.
23.Ne7+! Kg7!
The only move, as the f6-Rook would drop.
24.Qe3!
Joel offers a Queen trade. I took my time to think about what to do next, though by this point, he was coming around to everyone’s boards much quicker as the weaker players in the simul had mostly already been checkmated or resigned. Therefore I didn’t have as much time to think about this position and I had already used my three opportunities to pass earlier in the game. That doesn’t excuse the tactical oversights I committed in order to play my dreamy next move, however:
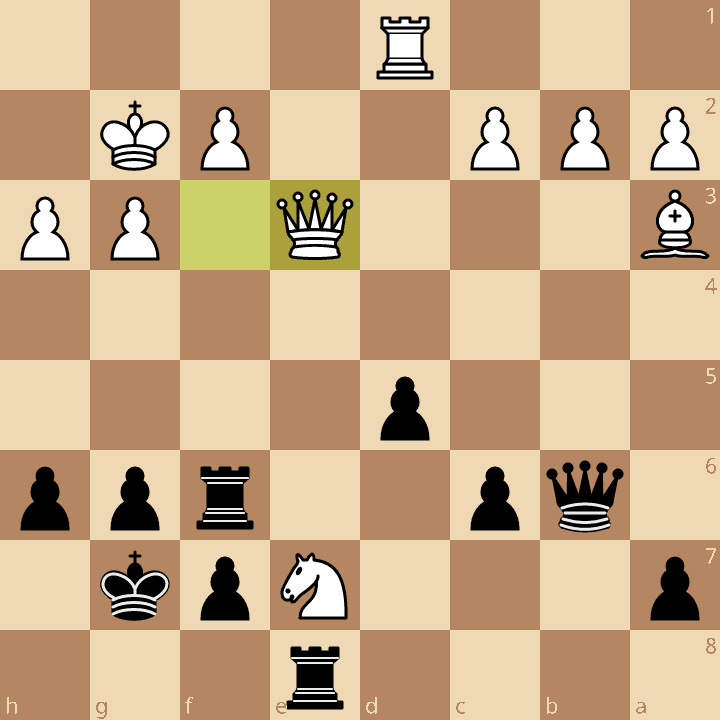
24…Qb7??
24…Qxe3 25.fxe3 Re6! — Joel would almost certainly squeeze the win out of this equal Rook and pawn endgame, but it was the only way to continue with any chance of a draw, and had I seen the coming dagger, I would have certainly chosen this continuation instead.
My thoughts while considering this move basically consisted of “I think I have some chances to attack his king here, so I don’t want to give up that opportunity”. In my head, I envisioned the possibility of c6-c5 and d5-d4, opening up my Queen on the long diagonal, and with control of the e- and f-files, having some long-lasting pressure against the king with my major pieces. I was starting to narrate a completely different game recap from the one I’m writing right now: this is how I gave Joel Benjamin a really hard time and almost defeated him but we ended the game in an epic and titanic struggle and he stood triumphant over my bloodied body but I put up the darnedest of fights and didn’t give him any quarter and just my readers wait until you read about —
25.Nf5+!
Shit. My Rook is hanging. It’s game over! I know it’s time to resign, but I put up a few motions of symbolic resistance anyway.
25.Rxf5 26.Qxe8 d4 27.Qe7 Qb6 28.g4 Rf6 29.Bc5 1-0
If there are any consolations that soften the sting of my final blunder, it was that my game was the one considered “most interesting” (in the sense of “most likely to draw”) by one of the organizers of the event who happens to be a national master. That’s pretty high praise, if you ask me, so I’ll take it!
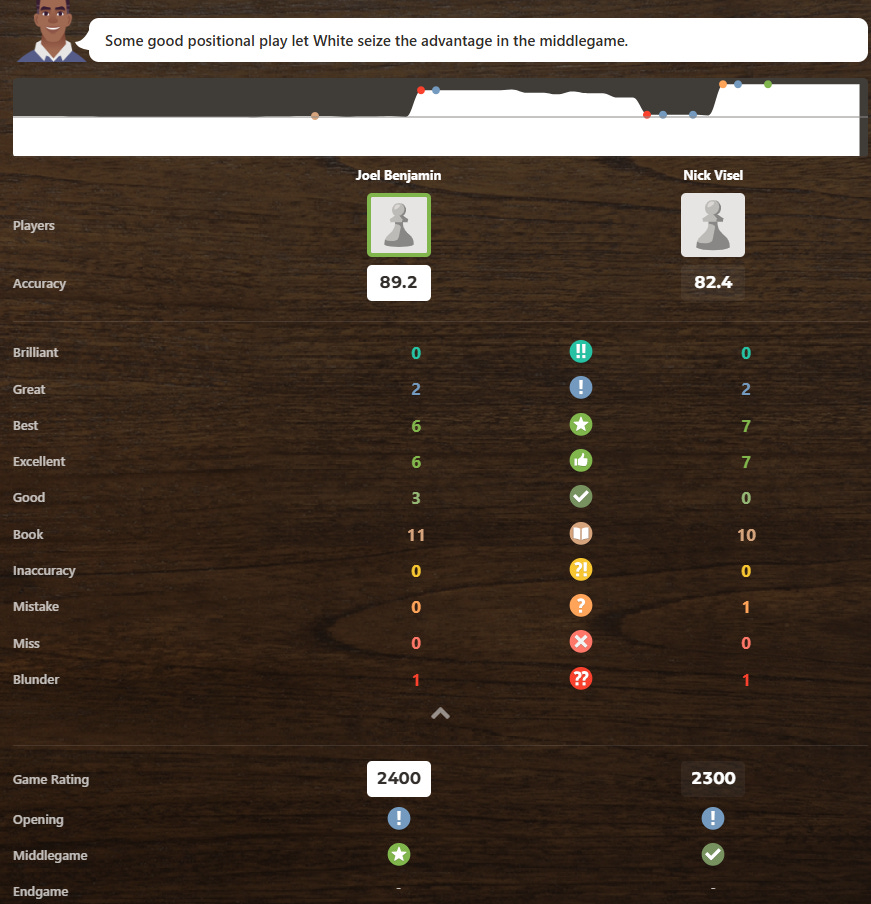
The chess.com Game Review Report Card also said some nice things, and while I am highly suspicious of these numbers in general — particularly understanding that the accuracy numbers are fudged (see link below), I am also not immune to the dopamine effect.

In the end, I’d like to say that I did just one more no-no than Joel and that’s why I lost this game — but that’s also why Joel Benjamin is a Grandmaster and I am not.
GIF of the game:
Thanks, as always, for reading!
Rxe7+ Qxe7 Qxb8+
So, you know I don't play chess and don't understand 98% of the parlance; I'm just a fan of you and appreciate the Nick-centric posts you write. You didn't comment on your marked improvement from last year! Yes, you're not a Grandmaster, but you're continually improving and I think that's important.